
Breaking Down the Science Behind GeoVue.
How it works
When a seismic pressure wave passes through the ground, it disturbs the natural electrical balance that exists around water in porous rock. As this balance resets, tiny electrical signals are created and travel back to the surface, where they are recorded by grounded sensors. These signals carry information about the type of rock and the fluids present underground. This electrical response only occurs when water or fluid is present in porous ground.
Data collection
Seismic energy is created by striking the ground to send a pressure wave into the subsurface. For very deep surveys — up to around 5,000 metres — a drop-weight system can be used, which leaves only a small 30 x 30 cm mark that can easily be restored. For shallower surveys up to about 500 metres, a simple sledgehammer and plate system is used, making it a cost-effective and flexible option.
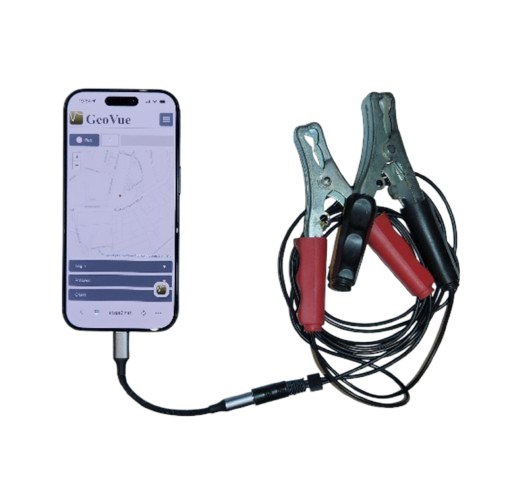
To record the data, you use a smartphone (iPhone or Android) connected to ground electrodes with a cable. The GeoVue web app records the signal and logs the location. Alternatively, any standard stereo audio recorder (16-bit, 44.1 kHz WAV format) can capture the data and upload it into the GeoVue system.
The recording setup uses two small metal pins placed about two metres apart in the ground. This simple dipole system makes it easy to take readings in areas where other survey methods would be difficult.
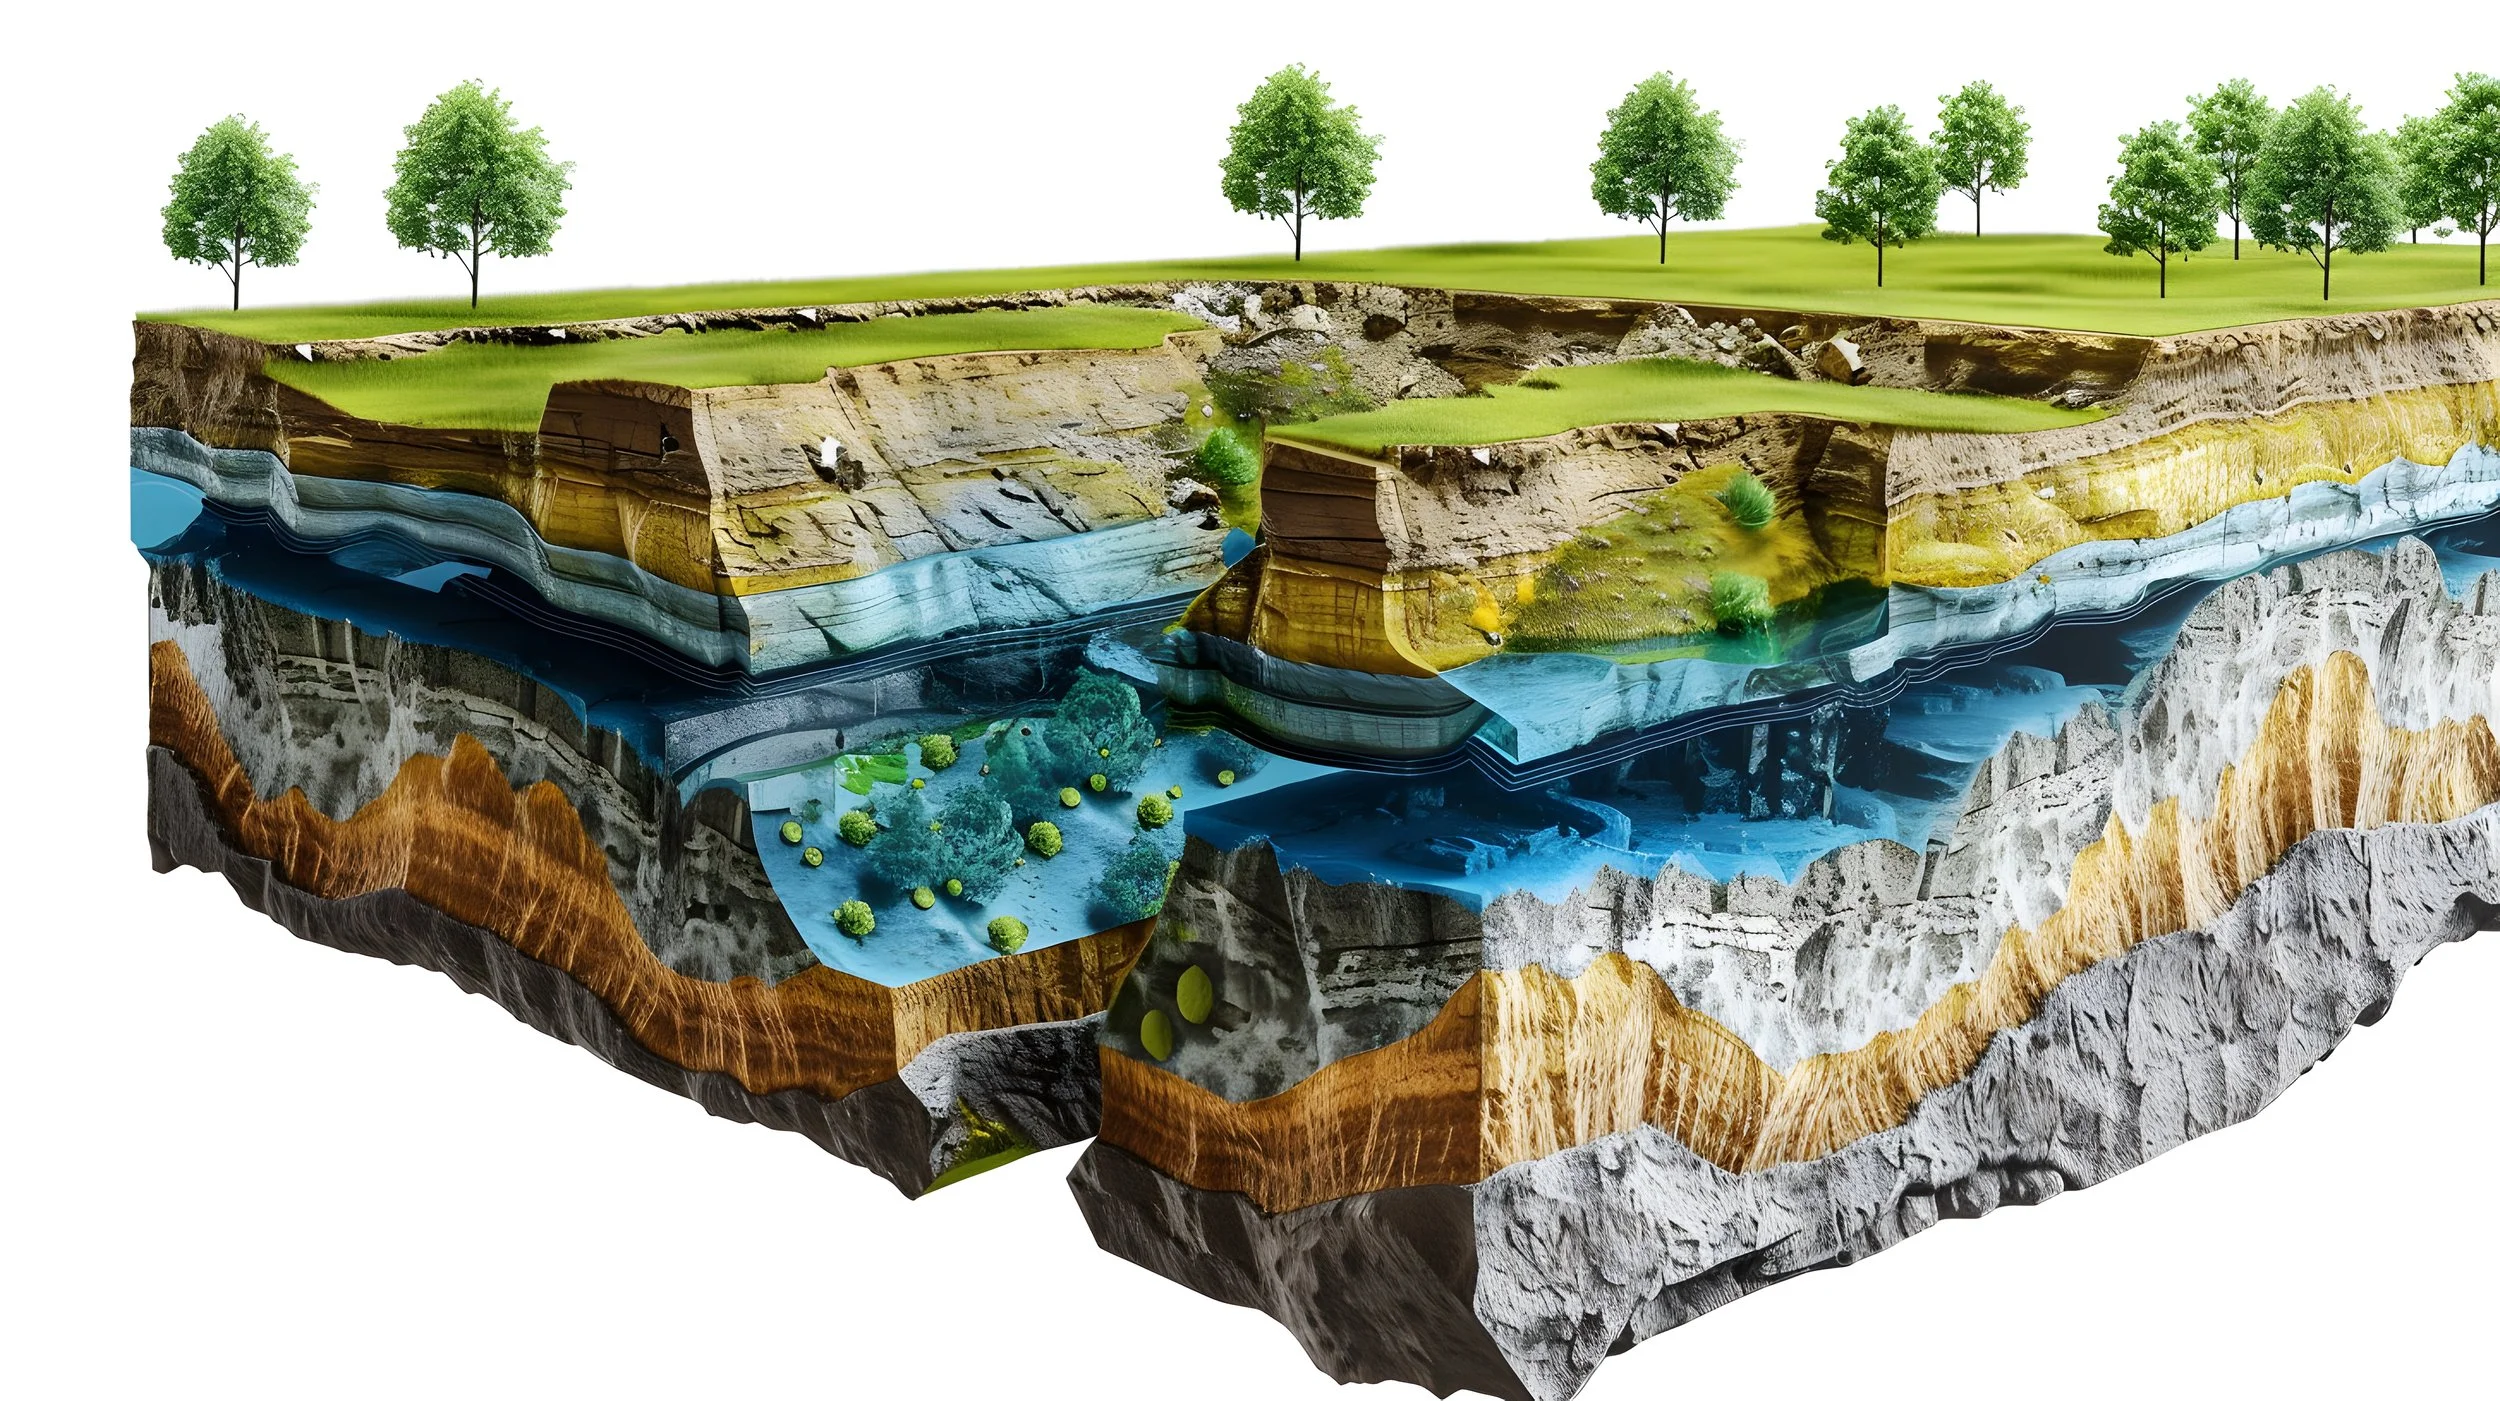
The Science
This image visually explains the science behind GeoVue’s electro-seismic technology step by step. It begins with a seismic impact source and grounded dipole antenna being used to send energy into the ground. The pressure wave moves through the subsurface and causes fluids within porous rock to shift. As ions in the pore spaces interact with the charged rock surfaces, a natural electrical double layer forms. When the seismic wave passes through and disturbs this layer, it generates a small electrical field. That electrical signal travels back to the surface, where it is recorded by the dipole antenna. The collected signals are then analysed to extract hydrological and geological information. When multiple survey points are combined in a grid, the data can be rendered into detailed 2D profiles and 3D subsurface models.
Work Flow
A simplified guide on how to use the GeoVue app
GeoVue User Guide
1. Create Your Account
Download the GeoVue app and set up your account.
2. Build Your Project
Create a new project inside the app.
Switch to satellite view to map your survey area.
Save your project once complete.
If your survey site does not have internet access, switch your device to offline recording mode before leaving.
3. Purchase Tokens
Calculate how many survey points and how much depth you require.
Purchase the appropriate number of tokens before heading to the site.
4. Open Your Project
Launch the GeoVue app and open your saved project.
Navigate to your first survey point using the map.
5. Install the Ground Pins
Insert two metal pins into the ground:
The first pin is your main recording pin (mark this location with paint or a tag).
The second pin should be placed approximately 2 metres (6 feet) away.
6. Connect the Cables
Clip the black cable to the main recording pin.
Clip the red cable to the second pin.
Connect the cable to your phone or recording device.
7. Record the Survey
Select the “Default” setting in the top bar if visible.
Press REC to begin recording.
You now have 30 seconds to complete 10 impacts.
Recommended method:
Strike the ground
Pause for 1-second
Strike again
Pause for 1-second
Repeat until you reach 10 strikes. Strikes should be happening every 2-3 seconds.
The green recording bar will move automatically while recording.
Understanding Your Results
PASS
If you receive a Pass notification:
The data quality is suitable for processing.
The app will confirm how many strikes were successfully recorded.
The survey point will automatically appear on your map.
You can now:
Unclip cables
Remove pins
Move to the next survey point
FAIL
If you receive a Fail notification:
This usually means underground electrical interference is present (e.g., electric fences, buried cables, pumps, rail lines).
Follow this process:
Retry at the same location.
If it fails again, move both pins approximately 1 metre away.
Re-mark the new location.
Reconnect and repeat the 10 impacts.
In most cases, this resolves the issue.
Continued Fails
If you continue receiving fails:
Replace your recording cables (always carry 2–3 spare sets).
Try again.
In rare cases, move further away from that location and retry.
Complete Your Survey
Continue the process until all planned survey points have been recorded.
Once complete, upload your data for processing.
Your interactive 2D and 3D report will be delivered via email once processing is finished.